AppsSensorsComputersLightingComponentsSecurityEnergyEntertainmentAppliancesHouseholdTelecomHubsNetworkingSelf-HostedCloudPhonesRadiosPlugsBulbsSwitchesLaptopsMini PCSoCCPUGPUNPUMemoryMotherboardNVMEWiFiFansLocksDoorbellsCamerasAlarmsSensorsMetersPlugsSolarBreakersTVsStreamingSpeakersAudio SystemsSmart KitchenSmart RefrigeratorsSmart DishwashersSmart Coffee MakersSmart OvensWashersDryersWater HeatersRefrigeratorsVacuumsMopsToothbrushesMirrorsScalesHumidifiersButtonsClimatePresenceZigbee HubZ-Wave HubWiFi HubBluetooth HubMatter & Thread HubLoRa HubMulti-Protocol HubSwitchEnclosureCurtainsWiFi APRoutersTablets
Self-hosting Home Assistant on Ubuntu Server with a Mini-PC, NUC or Homelab Server: A Beginners Guide
Published: May 5th 2025 @ 10:37PM
Unlocking the Power of x86 Hardware for Your Smart Home
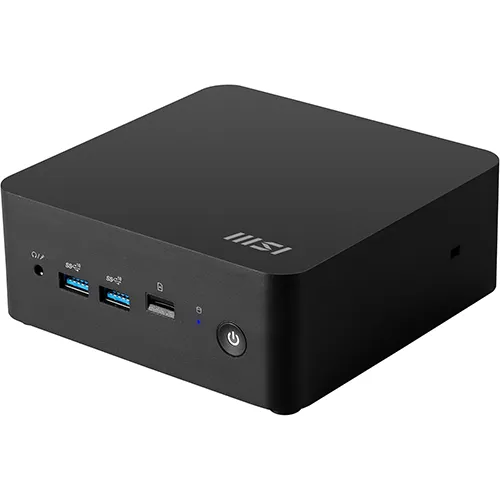
Welcome to your first step towards a smarter, self-hosted smart home. This guide walks you through setting up Home Assistant on an MSI Cubi NUC Desktop, leveraging the power of Ubuntu Server 24.04. Using an x86 mini PC provides more power, faster performance, and greater reliability compared to the ARM-based Raspberry Pi, especially when handling many smart home integrations and automations. Let's get started!
Step 1: What You Need
- MSI Cubi NUC Desktop (1MG-011US) or similar mini PC or any home-lab x86 server
- USB flash drive (8GB or larger recommended)
- Monitor, keyboard, and mouse
- Ethernet cable connected to your network
- Basic knowledge of using Ubuntu Server
Step 2: Download Ubuntu Server 24.04 or Higher
- Go to Ubuntu Server Download Page
- Download the latest Ubuntu Server 24.04 ISO file
Step 3: Flash Ubuntu ISO onto a USB Stick Using Balena Etcher
- Download Balena Etcher and install it
- Insert your USB flash drive into your computer
- Launch Balena Etcher
- Click "Flash From File"
- Select your USB flash drive as the target drive
- Click "Flash!" to write a bootable Ubuntu installer onto the USB stick
Step 4: Install Ubuntu Server onto Your Mini-PC or Server
- Plug the USB drive into the MSI Cubi NUC Desktop
- Connect the keyboard, mouse, monitor, and ethernet cable
- Turn on the Mini-PC and immediately press F11 (or relevant boot key) to access the boot menu
- Select the USB drive as your boot device
- Follow the Ubuntu installer prompts:
- Choose language, keyboard layout, and network settings
- Select your internal storage drive as the installation location
- Set up your user account with a strong password
- Complete installation and reboot your system
Step 5: Prepare Ubuntu Server
- Log in with your credentials
- Ensure you have a connection to the internet$ ping www.google.com
- Update and upgrade the system$ sudo apt update && sudo apt upgrade -y
Step 6: Install Docker on Ubuntu
Home Assistant runs best using Docker. Let's install it using Docker's latest instructions here: Install Docker Engine on Ubuntu
Step 7: Install Home Assistant Container
- Create a directory for your Home Assistant configuration$ mkdir ~/homeassistant
- Run Home Assistant in Docker:$ sudo docker run -d \
--name homeassistant \
--privileged \
--restart=unless-stopped \
-e TZ=America/New_York \
-v ~/homeassistant:/config \
--network=host \
ghcr.io/home-assistant/home-assistant:stable
Step 8: Access Home Assistant Web Interface
- From any browser on your local network, go to: http://[your-server's-local-ip-address]:8123
- Follow the on-screen instructions to create your Home Assistant account and complete the initial setup.
Step 9: Final Recommendations
- Consider enabling automatic updates and backups within Home Assistant
- Familiarize yourself with Home Assistant's extensive library of integrations to make the most of your smart home
