AppsSensorsComputersLightingComponentsSecurityEnergyEntertainmentAppliancesHouseholdTelecomHubsNetworkingSelf-HostedCloudPhonesRadiosPlugsBulbsSwitchesLaptopsMini PCSoCCPUGPUNPUMemoryMotherboardNVMEWiFiFansLocksDoorbellsCamerasAlarmsSensorsMetersPlugsSolarBreakersTVsStreamingSpeakersAudio SystemsSmart KitchenSmart RefrigeratorsSmart DishwashersSmart Coffee MakersSmart OvensWashersDryersWater HeatersRefrigeratorsVacuumsMopsToothbrushesMirrorsScalesHumidifiersButtonsClimatePresenceZigbee HubZ-Wave HubWiFi HubBluetooth HubMatter & Thread HubLoRa HubMulti-Protocol HubSwitchEnclosureCurtainsWiFi APRoutersTablets
Ultimate Guide to Setting Up a WireGuard Server on pfSense
Published: July 10th 2025 @ 5:18PM
Securely Access Your Smart Home Network from Anywhere
Setting up remote access to your smart home network can dramatically enhance convenience and security, allowing you to effortlessly monitor IP cameras, smart appliances, and various IoT devices from anywhere in the world. WireGuard, renowned for its cutting edge security, simplicity, and exceptional speed, provides a robust solution for remote connectivity. This comprehensive guide will walk you step-by-step through installing and configuring WireGuard on the latest pfSense firewall interface, setting up client devices, and optimizing your smart home connectivity for seamless remote access.
What Makes WireGuard Ideal for Smart Home Networks?
WireGuard is a modern VPN protocol acclaimed for its superior speed, streamlined efficiency, and robust encryption standards. Its lightweight and efficient codebase drastically outperforms traditional VPN protocols like OpenVPN and IPsec, making it particularly suitable for bandwidth-intensive smart home applications, including streaming from multiple high-resolution IP cameras, managing remote devices, and maintaining responsive smart home automation controls.
Network Requirement Considerations
Despite WireGuard's remarkable performance, it is essential to consider your ISP's upload speed. Upload bandwidth directly affects your ability to smoothly stream live feeds from IP cameras or conduct real-time remote operations. Ensuring your ISP plan supports sufficient upload speeds will maximize your experience with WireGuard. Most devices will perform fine for most upload speeds as they do not require much bandwidth, streaming video however can greatly increase the requirement of your home network's upload bandwidth. The higher the resolution and the number of cameras you wish to stream at once are the greatest factors.
Here's a quick breakdown of upload speed requirements for remotely streaming one IP camera at 30fps, assuming standard H.264 compression:
Here's a quick breakdown of upload speed requirements for remotely streaming one IP camera at 30fps, assuming standard H.264 compression:
- 720p (HD): ~ 2-3 Mbps
- 1080p (Full HD): ~ 4-6 Mbps
- 2K (1440p): ~ 7-10 Mbps
- 4K (2160p): ~ 15-20 Mbps
Step-by-Step Guide: Setting Up WireGuard on pfSense
- Installing WireGuard Package
Log into your pfSense GUI, navigate to System > Package Manager > Available Packages, search for WireGuard and click Install. Wait until the installation completes successfully. - Creating a WireGuard Tunnel
Go to VPN > WireGuard, and click Add Tunnel. Configure the settings:- Enable Tunnel: Checked
- Description: Provide an intuitive description (e.g., "SmartHome VPN")
- Interface Keys: Click Generate to create public/private keys. Save these securely.
- Listen Port: Default is typically fine (51820)
- Configuring Firewall Rules
Navigate to Firewall > Rules, select the new WireGuard interface tab:- Click Add to create a new rule
- Set action to Pass
- Protocol: Any
- Source and Destination: Set both to Any for comprehensive connectivity
Under Firewall > NAT > Outbound, select Hybrid mode, and ensure rules allow WireGuard outbound connections. Save and apply. - Setting Up Peer (Client) Connections
Under the WireGuard tunnel created earlier, click Add Peer: - Public Key: Obtain this from the client device after setup (see instructions below)
- Allowed IPs: Typically, an IP range such as 10.0.0.2/32 for individual clients
- Persistent Keepalive: Recommended setting: 25 seconds to maintain connectivity through firewalls and NAT
- Interface Section:
- Generate a new private key (the client app will automatically provide a corresponding public key)
- Enter the client IP provided earlier (10.0.0.2/32, for example)
- DNS can be your preferred DNS or the pfSense DNS resolver's IP if you need DNS to come from pfSense
- Peer Section:
- Endpoint: Enter the public IP or domain of your pfSense server and port (51820)
- Allowed IPs: Typically set to 0.0.0.0/0 to route all traffic through the VPN, or specific IP ranges as needed
- Public Key: Paste the public key generated from your pfSense WireGuard tunnel
Repeat this for each client device.
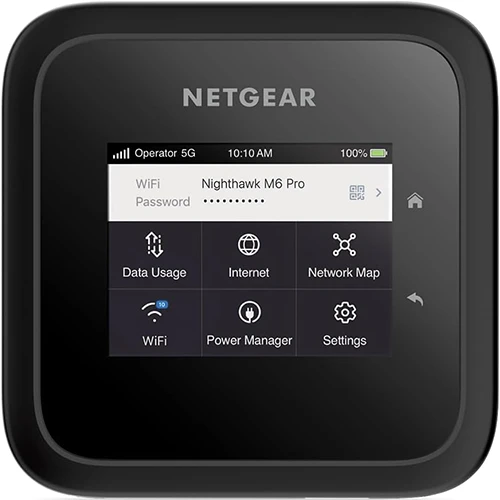
Featured Product: NETGEAR Nighthawk M6 5G Mobile Hotspot
The NETGEAR Nighthawk M6 5G Mobile Hotspot is a powerful, versatile, and highly portable solution, perfect for providing secure, high-speed internet access to your smart home network from remote locations. With robust 5G capabilities, this hotspot device can effortlessly handle demanding tasks such as streaming high-resolution video from multiple IP cameras, managing smart appliances, and ensuring reliable connectivity for remote smart home management. Its built-in support for WireGuard VPN makes the Nighthawk M6 an ideal choice for securely connecting your remote location directly to your WireGuard server hosted on pfSense. Simple to configure and easy to manage through its intuitive interface, this mobile hotspot dramatically enhances the remote connectivity experience for your smart home network.
Featured Product
NETGEAR Nighthawk M6 Pro Mobile Hotspot 5G Travel Router, mmWave, 8Gbps, Unlocked
Where to Buy
Supported Connectivity
wifi
http
localConfiguring Client Devices
WireGuard supports numerous devices, making it incredibly versatile for smart home ecosystems:
- Mobile Phones and Tablets: Use WireGuard apps available for Android and iOS. Simply input the server details, including server IP, client private key, and allowed IPs.
- Laptops and Desktops: Install the WireGuard client application, available for Windows, macOS, and Linux. Create a new configuration, input server IP, private keys, and assign client IP.
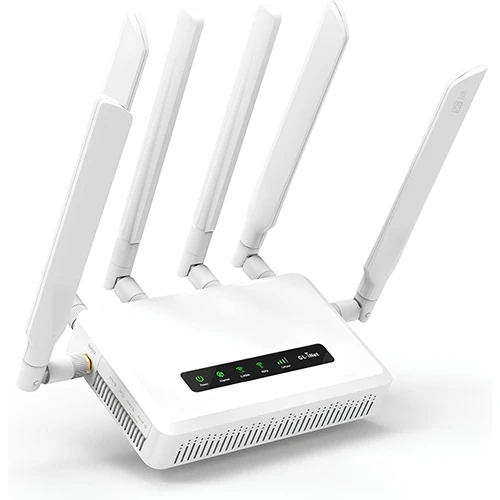
- Travel Routers: Devices like GL.iNet's series of travel routers have built-in WireGuard support, ideal for securely connecting entire remote locations, such as vacation rentals or hotels, back to your smart home network.
Split Tunnel vs. Full Tunnel: Understanding the Differences
When configuring WireGuard VPN, it's important to understand the difference between split tunnel and full tunnel modes, as each has distinct use cases:
- Split Tunnel: Routes only specific traffic destined for your smart home network through the VPN tunnel, while general internet traffic bypasses the VPN. This mode can lead to DNS leaks if DNS requests are not routed properly through the VPN, potentially exposing your browsing history. It is ideal for users who only need access to specific resources on their home network, such as IP cameras or IoT devices, without routing all their browsing traffic through the VPN. It's better sutied for when the ISP/network you client device is connected to is trusted and you only need access to particular resources on your remote network.
- Full Tunnel: Routes all device traffic, including DNS queries, through the VPN tunnel, significantly reducing the risk of DNS leaks and enhancing overall security and privacy for all internet activities. This mode is beneficial when connecting from unsecured public networks or when privacy is a top concern, ensuring all internet data is securely routed through your trusted home network.
Testing Your WireGuard Setup
After setting up both server and client configurations, activate the client connection. Check your pfSense WireGuard status (VPN > WireGuard > Status) to confirm active peers. From your remote device, attempt accessing resources within your home network, such as viewing IP camera streams or controlling smart home devices to validate connectivity.
Addressing Bandwidth Limitations
While WireGuard efficiently handles remote smart home access, limitations may arise from your ISP upload speeds. To manage bandwidth effectively:
- Configure IP cameras to lower resolution or bitrate when remotely accessed
- Prioritize bandwidth-sensitive applications through pfSense's traffic shaping features
- Schedule regular backups or large data transfers during off-peak hours to minimize bandwidth strain
Enhancing Security
To further secure your smart home network:
- Regularly update pfSense and WireGuard software
- Utilize strong, unique encryption keys
- Monitor WireGuard connection logs periodically for any suspicious activity
Conclusion
Setting up a WireGuard server using pfSense significantly enhances your smart home experience, providing secure and fast remote access. With comprehensive client device compatibility and performance optimized for bandwidth-intensive tasks, WireGuard remains an excellent choice for managing your smart home ecosystem remotely. Follow these steps carefully to unlock seamless, secure connectivity for all your smart tech devices, no matter where you are.